Tuesday, December 13, 2011

New Design Ideas for 2012

Okay for 2012 I would like to freshen up my ideas and design so I thought I would ask you my readers for some help. Well after viewing my products and style what new designs or items would you like to see in 2012?

As you may or may not know I am a recycle artist so all of my items are re-using something else. What new materials could I look for?

I have a couple neat items in the works.... so stay tuned for move of those items as the year goes by.

All input is welcome so do not be bashful.

Tuesday, December 6, 2011

A Very Merry Christmas to You!

Ok so I have been very busy and have not update as often as I should have, so here is my Christmas Wish for you:

A Very Merry Christmas


Bringing the Holidays to you.

Tuesday, July 26, 2011

Treasury Tuesday

This week's Treasuries show off the beauty of Celtic work in tribune to our trip to the Ren Faire this weekend.


Next week look for a special post from our Ren Faire trip but in the meantime enjoy these wonderful artisans from Etsy.

Tuesday, July 19, 2011

Treasury Tuesday

I know its so hot across the country right so I thought that a little bit of "winter" might be appreciated right now. So here are some Christmas in July collections to help cool you down.


Tuesday, July 12, 2011

Treasury Tuesday

We are planning a trip to the Sterling Renaissance Festival in a few weeks. So I thought I would feature the pirate sellers of Etsy.


Well now its off to find a bottle of rum for me, Yo Ho me Hearties!

Monday, July 11, 2011

New How To Links

Here are a few of my Trash to Treasure posts that are neat ideas with general instructions on "How To" create them.

http://verycreative-verycreativecreations.blogspot.com/2011/06/trash-to-treasure_23.html

http://verycreative-verycreativecreations.blogspot.com/2011/06/trash-to-treasure.html

http://verycreative-verycreativecreations.blogspot.com/2011/05/trash-to-treasure-thursdays.html

Monday, July 4, 2011

Holiday Happenings

There will be no Treasury Tuesday blog post this week due to the Holiday on Monday.
So here to Celebrate the 4TH are these wonderful artists:


Tuesday, June 28, 2011

Treasury Tuesday

Here is this week's collection of beautiful hand crafted products for your enjoyment.


See you next week with more things to amaze the eyes and soothe the soul.

Thursday, June 23, 2011

Trash to Treasure

Ok so I finally got my act together to bring you the long hinted at Beach Project.....

So trashy find one was this bunch of shells - some collected over many years (childhood trips to see my grandparents on Long Island, NY), others from a trip to Galveston, TX while working in Houston for my day job and others purchased at garage sales from other peoples trips to interesting beachy places.


The second trashy find was this garage sale frame and cigar box.  Both of these are in nice condition and could be used as is for whatever but I decided that they were a little be plain in there current state.
Supplies: 
Shells
Wood Picture Frame
Hot Glue
Razor Blade Knife


Step 1: Sorting
You need to sort the shells and decide what your color pallet is going to be, what size shells fit your frame, is it going to be only shells or do you have coral, stone, sea glass in your collection of beach finds.  Do you want to add additional items?  Well now is the time to go get them out.

Step 2: Putting it all together
Now comes the time consuming part.  If your frame has a finish on it, sand it off so that the wood is rough thereby giving it texture for the glue to grab.  Dust off the saw dust before you start to lay out your design.  Start to lay out shells in what ever manner pleases your eye.  I found that I could only lay out a few shells before they start to slip off or out of place. Then glue those shells in place and move on to laying out and fitting more shells into place and glue those on.  As you go you will probably have drips and strings so stop and scrape them off with a razor blade knife.  This will keep your project nice and neat.  We do NOT want any tacky here....


Step 3: Finishing it off
Keep placing, adding and gluing until all of the spaces are covered including any small spaces where the shells do not meet.  These gap spaces can be covered from above with another shell or you could wind a strand of faux pearls around the frame to cover these spots.  Let your creativity run wild... until to have recycled art to wear and love.

Here is my finished frame displaying a vintage Hampton Beach postcard.  If you like this frame but are not up to the 3 or so hours it takes to create this 5 x 7 inch frame it is available for purchase in my shop:
www.verycreativecreations.etsy.com


Now for the cigar box that will become a sailor's Valentine jewelry box..... look for that one in the near future.

Tuesday, June 21, 2011

Treasury Tuesday

Here are the special Treasuries for this week:


Well that's all for now. See you on Thursday for the beach trash to treasure project.

Tuesday, June 14, 2011

Treasury Tuesday

Here are the beautiful things create by awesome artists this week:


See you next week with more of the beauty of Etsy....

Thursday, June 9, 2011

Trash to Treasure

Ok, many things have gotten in the way of the Trash to Treasure feature I wanted to present today.  SOoooo... no beach project this week.  If I am lucky I will present it next week as an unscheduled special posting.

So in place of my beach Trash to Treasure I will present you with my next best thing..... an antique button upcycle.

This project is based on a tin full of antique buttons that I found at the local flea market.  Now I needed these special little beauties like I needed another hole in the head buuuttt who could pass them up.  I have thousands of buttons just waiting for their turn in the sun, so to speak.

So as I began to play with these small sweet metal pieces of artwork, I begin to think what can I do with these.  Finally I decided a bracelet would honor these best and show off the dainty beauty of these antique pieces of art. 

 So now how do I not ruin these scarce to rare pieces of fashion history to create this new piece of recycled art to wear and love.  Well I found pink mother of pearl flower beads in my stash.  These are drilled from side to side with a hole in the center just perfect for the shank of the button button to fit in.

After laying the design out and spending about 1/2 hour to an hour fiddling with it and stringing it.  Here is the outcome.  What do you think?


Now if you really like this bracelet and think you would like to own it, it is available in my shop.

Be on the look out for the special beach post coming soon to you!

Tuesday, June 7, 2011

Treasury Tuesday

Check out all the wonderful things I found for you this week:


Enjoy and see you on Thursday for Trash to Treasure.

Thursday, June 2, 2011

Reminder.....

Hey this is just a quick post to REMIND You to look for next Thursday's Trash to Treasure post.

I am in the process of gathering, organizing, taking pictures for this neat post base on summer at the beach.

This will be a great way to save memories and provide you with future gift items.

So look for this great idea next Thursday June 9th!!!

Tuesday, May 31, 2011

Thursday, May 19, 2011

Trash to Treasure Thursdays

Welcome to my first Trash to Treasure post.  These Trash to Treasure posts will occur twice a month on the 2nd and 4th Thursday of every month.  Trash to Treasure will discuss the journeys my finds take from things people want to get rid of to recycled art to wear and love.

This is what I found this week while out hunting with my husband, an antiques and collectible dealer.

 My first find was this lot of stainless steel and silver plate flatware ranging in age from the 1880s to the 1980s.  The flatware is all different patterns and makers.  Things that no one wants since they don't match, don't need anymore since some of these pieces are for children and ready for the trash if no takes them home.

My second find was this bag of broken costume jewelry that was sitting in a free box at a yard sale just waiting for a new home or the trash which ever came first.  Now the stuff in here ranges in vintage from the 1930s to the 1970s and some is useable by me and some is not.  Now the pieces that I do not use will get recycled again by going in 1 gallon bags of destash to be sold in my shop.
Heading off to my shop

Now I know you are thinking what can be done with mismatch flatware and broken costume jewelry that anyone could want?  How about a Fork or Spoon bracelet? 

Well let me walk you though my process.....

1. Selection: Part 1
First I start by selecting a matched pair of spoons or forks.  Single forks or spoons will get used in another design. (Check back for a Trash to Treasure post for those singles).  Once I have selected the pair I want these are then washed in regular hand dish soap and water and dried. Then I decide based on the pattern and size of the forks or spoons how large the bracelet will be approximately.

2. Creation:
Cut the spoon or fork end off and rough sand the sharp edges from the cut off.  (These parts will be used for pendants or other bracelets at another date.)  Now it is time to bend the remaining spoon/fork handles into a bracelet form.  I do this with a jig as it takes to much of a tole on my hands to hammer it around a bracelet mandrel. Once formed I then drill both ends to accept a split or jump ring later.  OK, time to sand and file out all of the rough spots and preliminary polish.

 3. Selection: Part 2
Off to the bag of broken costume jewelry.... it is now time to select the bead or link or charm that I feel compliments the bracelet pattern or design.

 4. Assembly:
Now comes the fun part.... putting it all together.  I added split rings and jump rings to the underside closing with either a lobster claw or toggle clasp.  These are either silver plate or stainless steel depending on the bracelet metal.  I match the closure metal to the bracelet metal meaning that if the spoon/forks were silverplate then the clasp would be silverplate.  I add a split ring or jump ring to the top or wire in the center accent piece.

 5. Final Finishing:
 Once everything is assembled I then give it a final polishing and buffering.  Since these bracelets are recycled I do not try to bring them to a blinding shine as I like these pieces to showcase their previous lives.

Here is my most recently completed piece:
Look for this and others in my shop. http://www.etsy.com/shop/verycreativecreation

I hope you have enjoyed this Trash to Treasure post.  Look for my next Trash to Treasure post on June 9, 2011.  In the mean time be on the look out for recycled art to wear and love.

Tuesday, May 17, 2011

Tuesday, May 10, 2011

Tuesday, May 3, 2011

Tuesday, April 19, 2011

Thursday, April 14, 2011

More Wealth to Share for Fellow Etsians


Here is just a quick note to share a few more Treasuries by fellow Handmadeology team members.

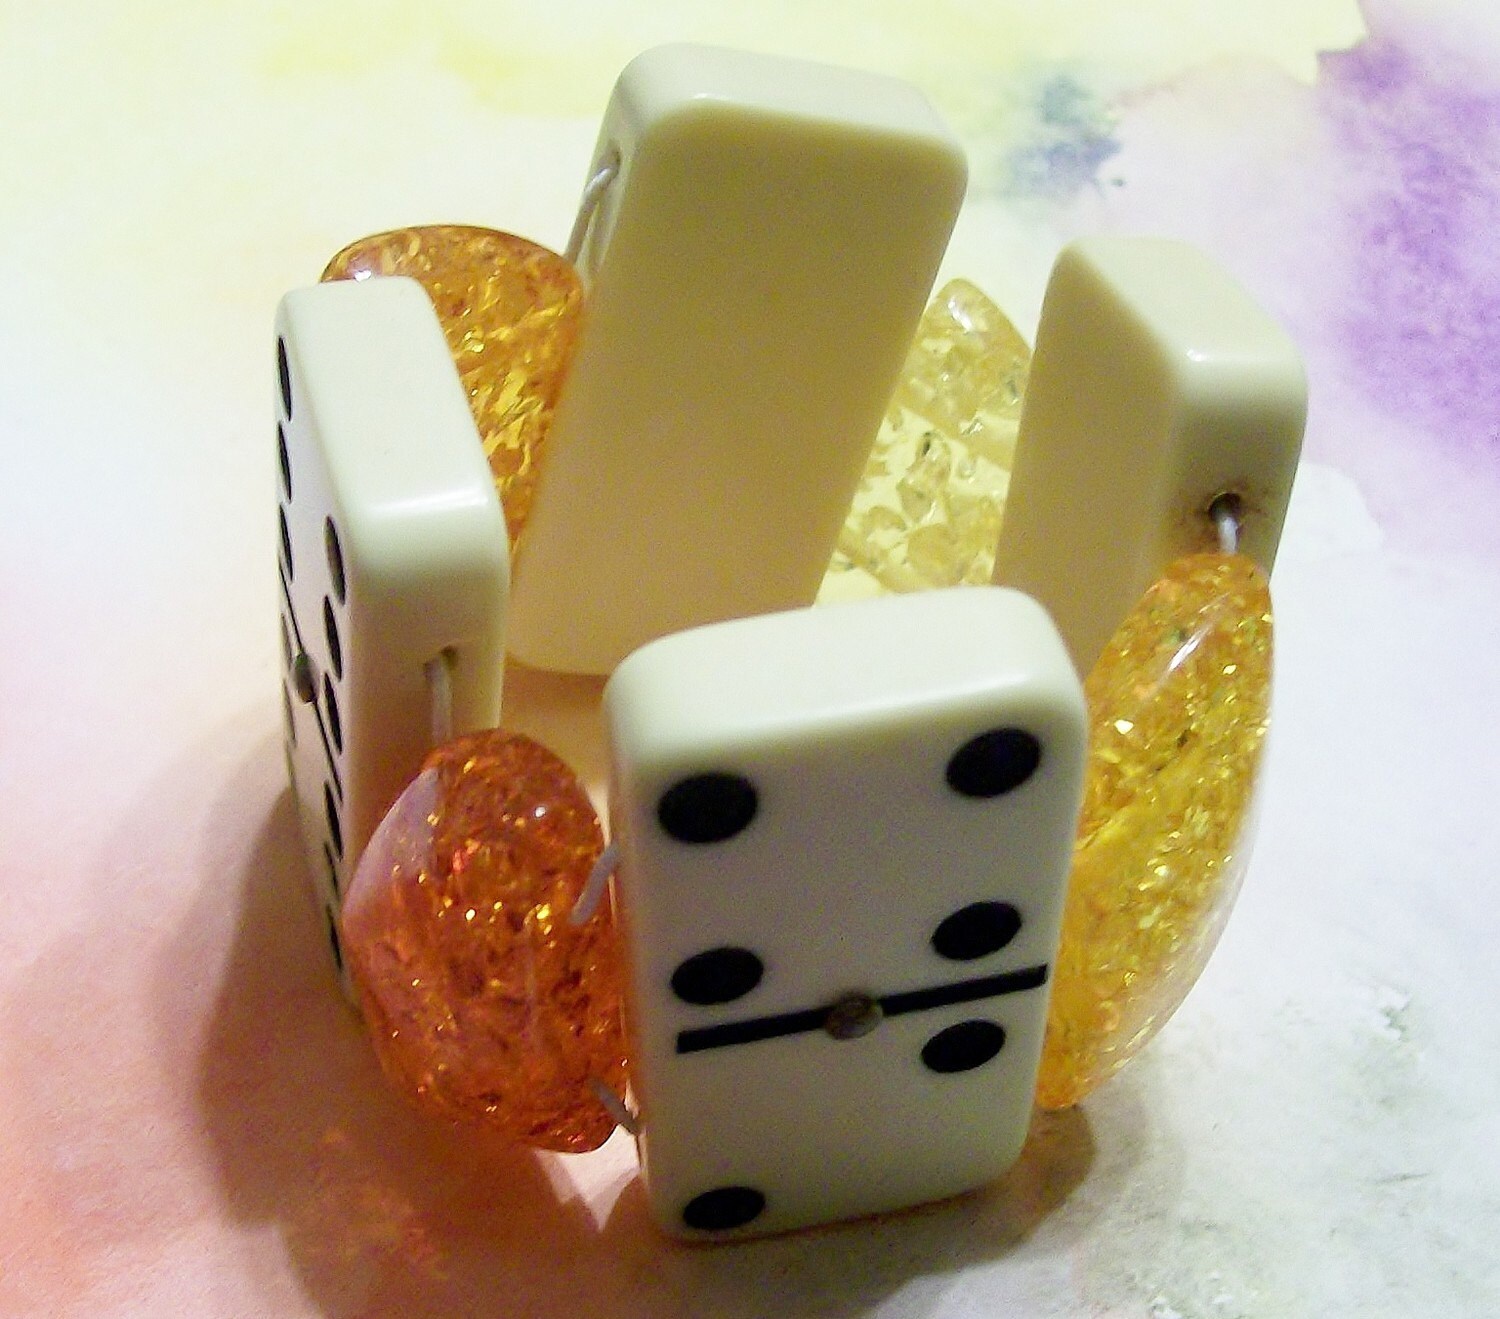
The first one is by Salzanos and features one of my game piece bracelets as seen above.
http://www.etsy.com/treasury/4da5d91d91a78eef317b1109/if-you-miss-this-one-you-will-just-cry


The second treasury is by Steampunk Funk features vintage pieces in neutral colors, very classy.
http://www.etsy.com/treasury/4da64cee290a6d914a571857/like-a-fine-wine

So grab your favorite beverage and a snack and sit down a browse these amazing pieces to your hearts content.  Everybody needs some me time.  Take yours today with this amazing collection.

Tuesday, April 12, 2011

Testing a New Layout

This is a test posting for my new layout.  Just wanted to see how it would look.  The picture above is just another one of my geode creations.  This one reminds me of a summer sunset.  Still waiting on spring still let alone summer!

 Check out this Springy looking  Treasury by :coollight of the Handmadeology Team:
 http://www.etsy.com/treasury/4d9d281bd48a8eef15831587/a-sum-of-many-parts

Here is another Treasury by: kraftykash of the Handmadeology Team:
http://www.etsy.com/treasury/4da0a466a1b98eef020527b5/random-beauty-exists

KraftyKash featured me on her blog this week. Check out her blog at www.kraftykash.blogspot.com  Also featured on KraftyKash's blog this week is another Etsy shop by the name of Steampunk Funk.  I just Lllloooovve her stuff.  Both mine and Steampunk's shops offer giveaways on KraftyKash's blog so go read it and enter to win one of these great giveaways!

Wednesday, March 2, 2011

Daydreaming of Spring so tired of winter....

I am so tired of the snow and cold this winter in Upstate NY.  So as I sat daydreaming of spring and not completing the work I should be doing.  I thought what have my fellow artisans created for this spring.  So I went out and perused items created by Team Upcyclers. 

This team uses already existing items to create all their creative creations.  They do their part to help the environment by reusing, repurposing  and recycling everyday objects into new and wonderful creations.  These are all items that said spring to me.  

Now I am not a tree hugger by any nature but do believe we should not abuse our planet.  So if you have the time to daydream or long for spring as I do, why not take a trip over to Etsy and browse or daydream of spring with me.

This is what I found....http://www.etsy.com/treasury/4d6e6a5184648eef072b0801/spring-has-sprung-or-hoping-so?index=0

Tuesday, February 22, 2011

A Little Extra Help.....


I was reading a post on the forums at Etsy yesterday about balancing small children and trying get a handmade business off the ground, that made me think of all the "Extra Help" we creative moms receive while trying to get our businesses off the ground.

 I am a mom of 3 of which only my third child is still small enough to present me with this challenge of "Extra Help".  My son is 4 with older sisters of 13 and 20 so he thinks he needs to "Help" mom all that he can.  I am sure there are many moms out there that can relate to this sort of "Help" from our loving, funny and some times frustrating children.

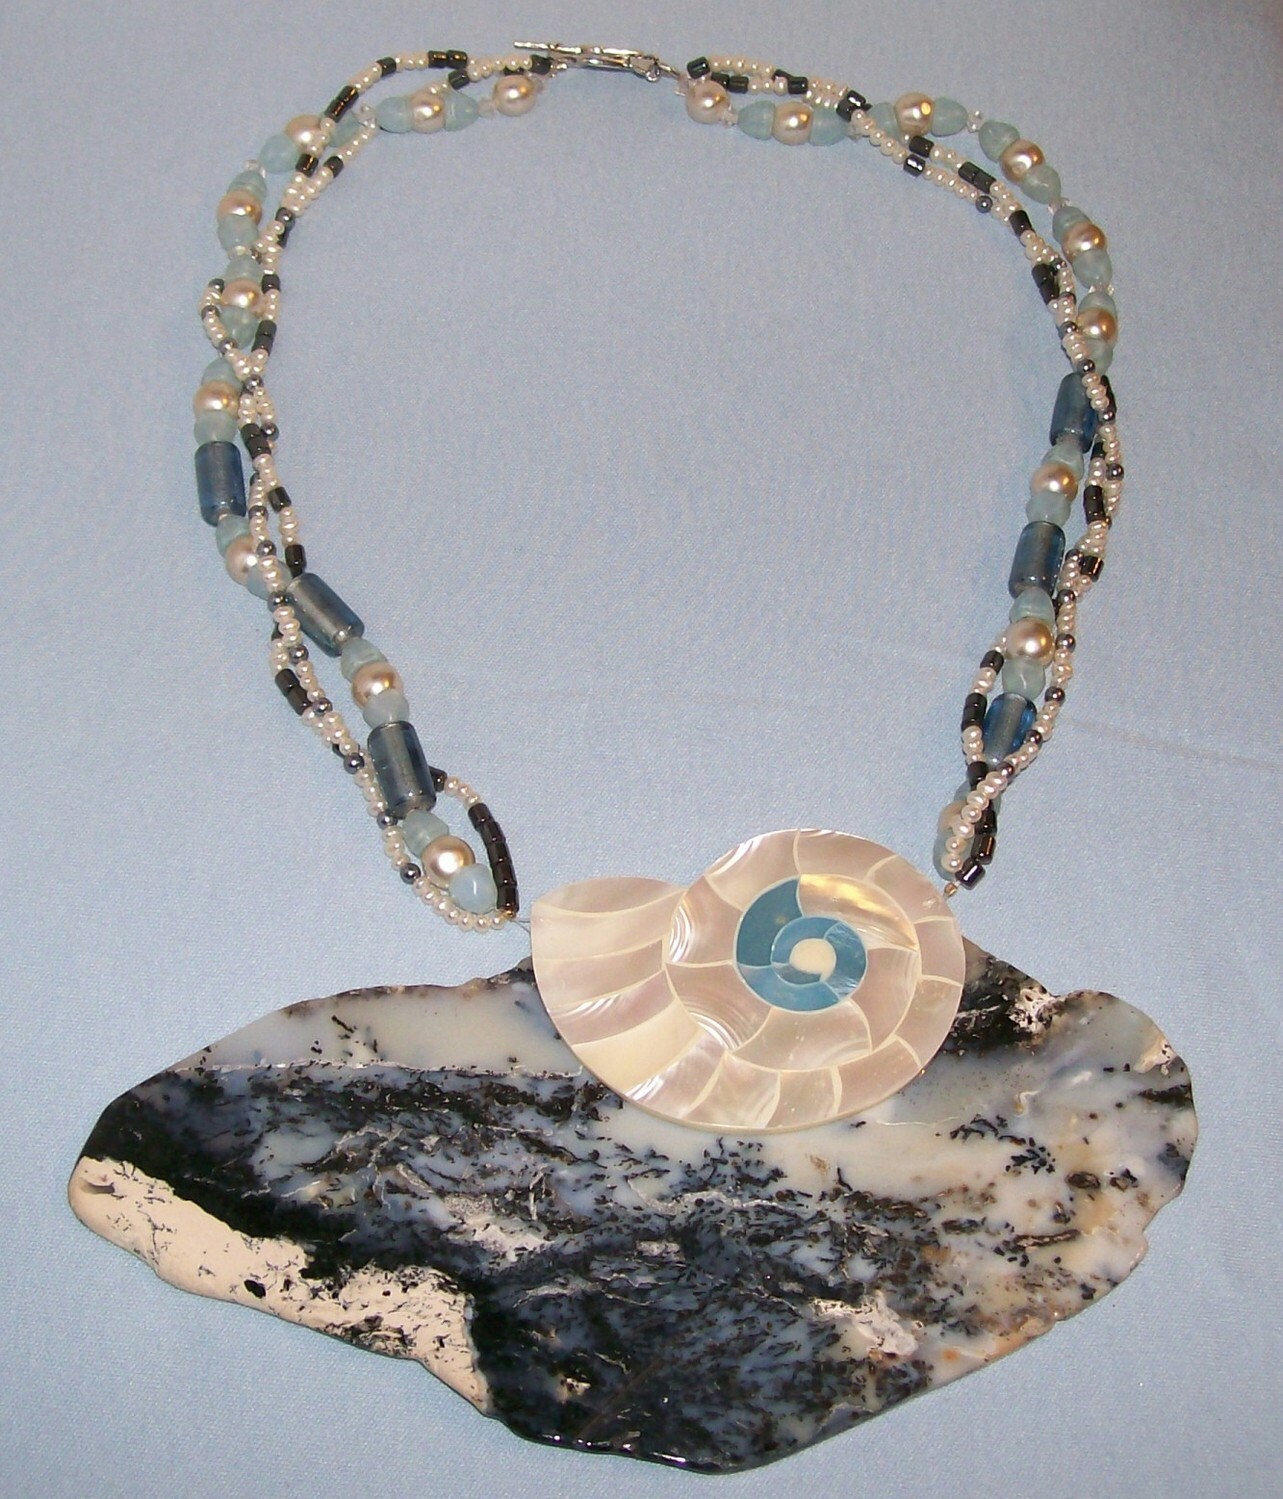
 While laying out my design for my "Storming Seas" necklace I received a lot of "Extra Help" from my little guy.  This design is based on the blue agate geode and how it reminded me of a stormy sea.  I proceeded to hunt for items to go along with this theme in my vast collection of vintage beads, gemstones and focals only to have my son decide that fresh water pearls make great balls to play with and he walked off with a least a quarter of my stock I had laid out for this design.  Then as I am just getting all of strand patterns laid out the phone rings, my darling husband while on lunch break from work....  Since my attention is now directed to my phone conversation my little guy decides mom's design is not to his liking and needs to be re-worked.  Now that I am off the phone and can come back to my design to start stringing, I find the bead board is in shambles with pearls everywhere, hematite, and glass beads sprinkled in here and there and the clasp no where to be found.  At this point I asked my son where the clasp has gone and he says it is taking a ride with Thomas the tank engine, via magnet on the engine tender.  And so the story continues... but in the end all his "Extra Help" did produce a pretty stunning work of wearable art, if I do say so myself.

I am sure many of you have received this sort of "Extra Help" from your child or children at one point or another.  I my opinion these are the times that are hard when they happen but funny or at least amusing much later and make our work and lives so much richer than those of  us who choose a different path in life.  So in the end it is a challenge to try and work through our schedules to do this sort of work with small children as the poster on the forum was stating but they are memories that are yours for a lifetime to relive and enjoy.

So in conclusion, should you wait until your child or children are grown to try and pursue your dreams, I guess it depends if you can handle the "Extra Help".  Can you use the "Extra Help"?

Thursday, February 17, 2011

The Daunting First Post......


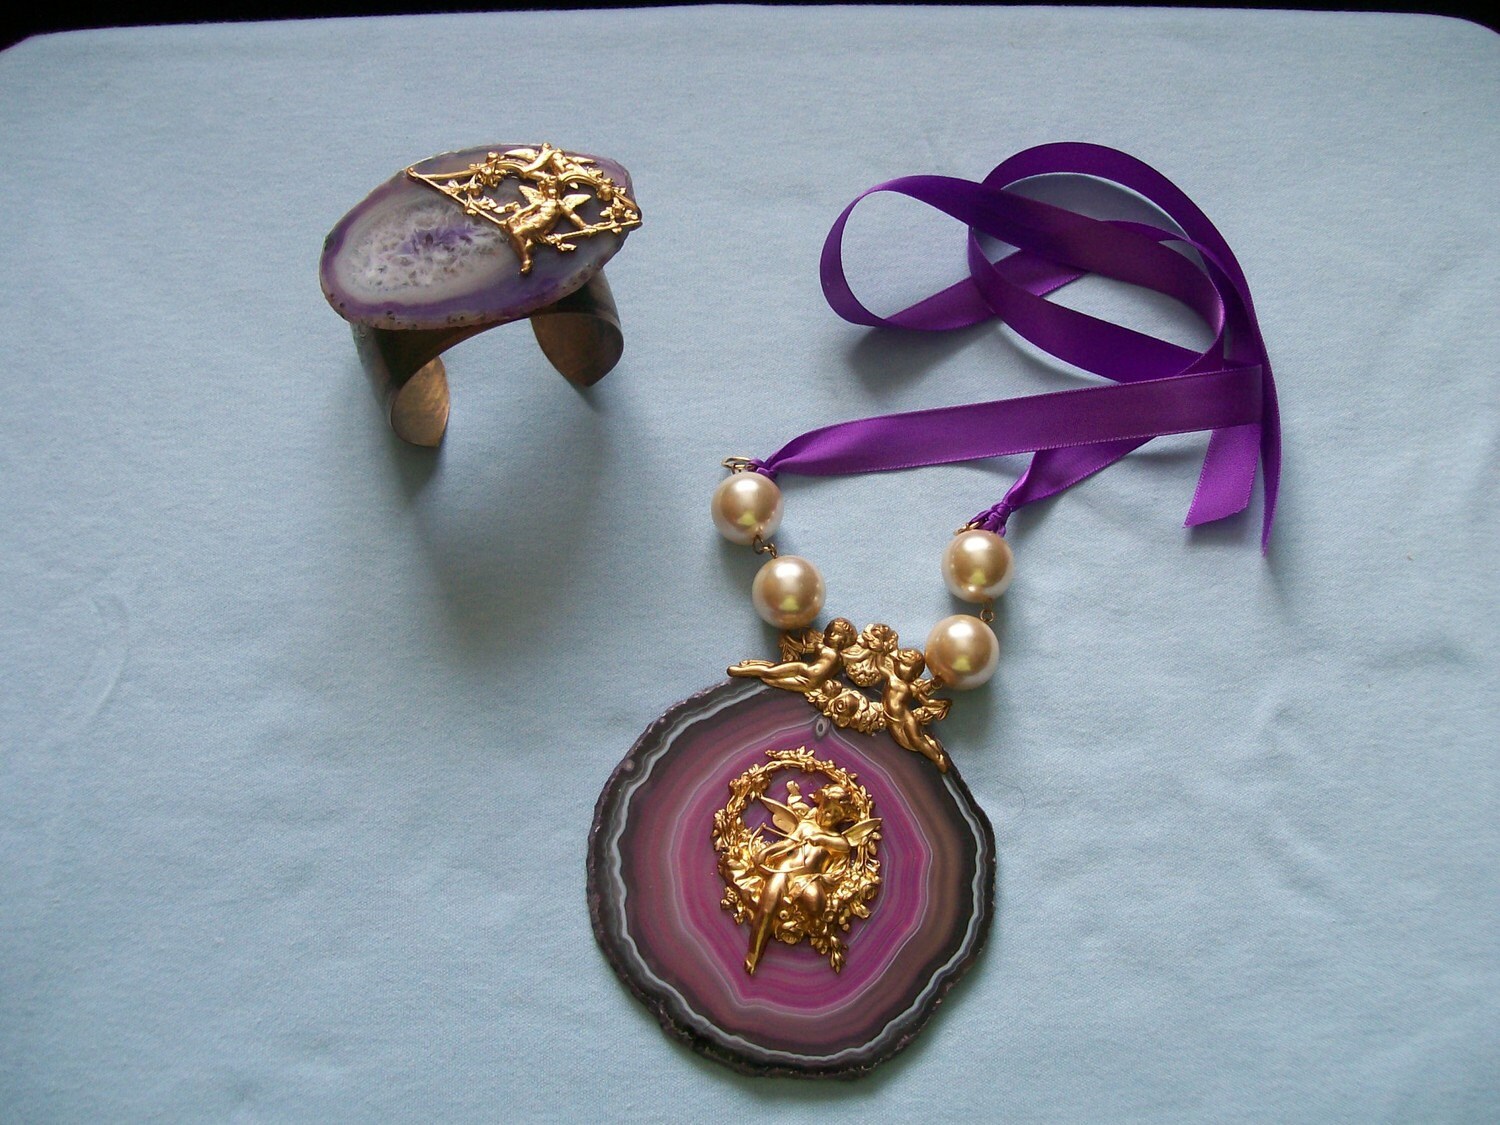
Ah, the daunting first post! I thought I'd kick things off talking about a piece I finished recently that I really love. I made this amethyst agate geode necklace/bracelet set out of an Amethyst agate geode accented in the with a vintage brass angel encircled by a wreath and suspended by another pair of angels connected by a pair of 20mm faux glass pearls.   I decided that the beautiful purple satin ribbon was the perfect way to allow for flexible length selection allow you to adjust the length from a choker to 36" long for the opera.  The ribbon is the perfect soft accent for this bold free-form pendant that is an amazing 4" wide by 4.5" tall from the top of the angels to the bottom of the geode.

Now about the companion bracelet.... this is also an amethyst agate geode that has been mounted on a vintage floral engraved brass cuff.  The top of the geode is accented by another vintage brass stamped angel accented by floral vines and a pair of love birds.  The geode on the cuff measures 3.25" wide by 2" tall.  This cuff does have some flexibility to form to your wrist. 
This happens to be one of a collection of geode necklaces I've been working on for the past couple months with the attempt to compliment the color that nature has given each of these geodes. All of my geodes are obtained on the second hand market of garage sales, flea markets, estate sales, etc. I just love the large ones since they are such bold statements of nature. I have made a couple of these for myself as prototypes and they never fail to get people talking and exclaiming what a creative creation.